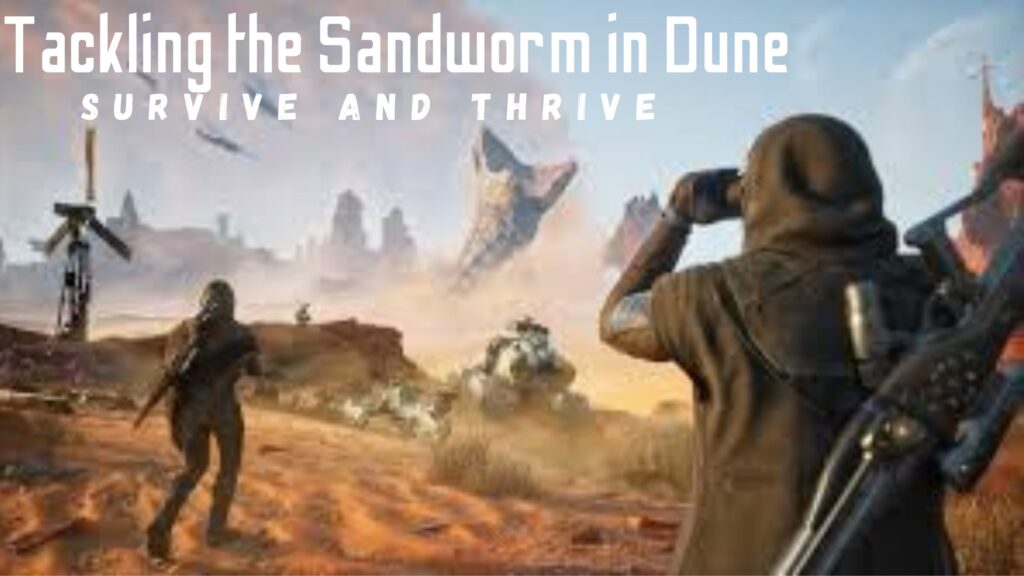
The vast deserts of Arrakis hold many dangers, but none as iconic or terrifying as the mighty Shai-Hulud. These colossal sandworms are the ultimate predators in Dune: Awakening, capable of devouring players whole, along with all their hard-earned gear and resources. As players venture across the dunes in 2025, understanding how to navigate worm territory has become an essential survival skill. When facing these behemoths, having enough resources can mean the difference between life and death – and that’s where services like Lootbar come in handy for players needing quick Solari top-ups to replace lost equipment.
Why Sandworms Are a Core Threat

Understanding the severity of worm encounters is crucial for new players. Unlike standard enemies that might damage you or knock you down, sandworms offer no second chances. When a worm catches you, it means:
· Instant death with no chance to escape
· Complete deletion of all carried gear and resources
· Loss of any vehicle youre riding
· No possibility to retrieve your items afterward
The game does offer a single mercy – your first worm death may return your vehicle blueprint and grant you a worm tooth, but subsequent deaths are far less forgiving. This permanent loss mechanic creates a psychological tension unlike anything else in the game, making even crossing short stretches of open sand a heart-pounding experience.
Community stories abound of players getting trapped in quicksand patches, helplessly watching their vibration meters spike as worms home in on their struggles. These shared experiences have created a collective thrill among players, with “worm stories” becoming badges of honor in the community.
How Sandworms Detect You
The key to survival lies in understanding the worm detection system. Your HUD displays a vibration meter that indicates how much attention youre drawing:
· White/Yellow: Low risk, minimal vibrations detected
· Orange: Moderate risk, worm is becoming aware of your presence
· Red: Imminent danger, breach likely within seconds
Your actions directly impact this meter. Sprinting across sand creates significant vibrations, while jumping produces sharp spikes that can immediately attract nearby worms. Even using technology like personal shields or suspensor belts drastically increases your detection risk.
The most dangerous mistake new players make is ignoring this meter, thinking they can outrun a worm once it detects them. By the time the meter flashes red, it’s often already too late – you have mere seconds to reach rocky ground before becoming worm food.
Proven Avoidance Tactics
Veteran Arrakis survivors have developed reliable strategies to navigate worm territory:
Stick to Rocky Terrain: Sandworms cannot breach rocky surfaces, making outcrops, yardangs, and mountain passes safe zones. Plan your journeys as “island hopping” between these safe areas, minimizing time spent on open sand. The most successful desert travelers never cross wide dunes without plotting their escape route first.
Crouch-Walk When Necessary: While slower, crouching significantly reduces vibrations. This technique buys precious time when crossing sand, often making the difference between reaching safety and being consumed. Develop the discipline to crouch automatically when stepping onto sand – it becomes second nature to experienced players.
Disable Technology on Sand: Personal shields, suspensor belts, and other vibration-generating devices act like dinner bells for worms. Toggle these off before crossing sand, even for short distances. Many players have lost everything because they forgot their shield was active during what should have been a safe crossing.
Recognize Breach Signs: A worm will typically breach once before attacking, giving you a brief warning. Look for sand clouds, listen for the distinctive rumble, and watch for the red breach icon on your compass. When these warnings appear, sprint immediately to the nearest rocky ground without hesitation.
Use Vehicles Strategically: Ground vehicles like sandbikes create more vibrations than walking but offer faster escape. Use them for direct, planned routes between safe zones rather than extended desert exploration. Always maintain enough fuel for emergency acceleration when crossing dangerous areas.
Avoid Drumsand Areas: These special sand formations create louder vibrations with each step, accelerating worm attraction. They’re visually distinct with a slightly different texture – experienced players learn to identify and circumvent these death traps even when they appear on the shortest route.
Tactical Survival Tools
The developers have provided several specialized tools to help manage worm encounters:
Sandbikes with Boosters: These vehicles provide the fastest ground transportation across sand, with emergency boost functions that can provide life-saving acceleration when a worm breaches nearby. The trade-off is their high vibration signature, making them best for planned, direct routes rather than exploration.
Thumper Decoys: These deployable devices create intense vibrations that attract worms away from your location. Strategic placement allows you to harvest resources or cross dangerous areas while the worm is distracted. Advanced players carry multiple thumpers for extended harvesting operations in rich spice fields.
Ornithopters: These flying vehicles represent the ultimate worm-avoidance tool, allowing you to hover safely above the sand or land briefly to reset worm aggro. While expensive to craft and maintain, their ability to traverse worm territory without risk makes them invaluable for serious players.
Gaining from the Worm: Worm Teeth & Crysknives
Being consumed isn’t entirely without benefit. Worm encounters can yield worm teeth, rare crafting components used in several valuable recipes. Most notably, combining a worm tooth with plant fiber creates an unfixed crysknife – a powerful but temporary weapon.
These unfixed crysknives provide excellent emergency combat options but degrade quickly. Experienced players craft multiple crysknives and equip them just before engaging tough enemies, switching to more durable weapons for general exploration.
Some advanced players deliberately attract worms to harvest teeth, though this extremely high-risk strategy is not recommended for beginners. If attempting this, always bring a team with ornithopters for quick extraction.
Balancing Risk with Reward
The most valuable resources in Dune: Awakening – particularly spice and flour-sand – are typically found in areas with high worm activity. This creates a deliberate risk-reward mechanic where players must balance safety against profit.
Successful harvesting strategies include:
· Using thumpers to distract worms while quickly gathering resources
· Positioning team members on rock outcrops to monitor worm activity
· Employing vehicles for rapid extraction when vibration meters spike
· Establishing temporary safe houses near valuable resource nodes
Group strategies have proven particularly effective, with designated “bait” players drawing worm attention while harvesters work efficiently. This coordination requires practice but dramatically increases yield from dangerous areas.
When to Top-Up Solari for Sandworm Strategies
Building an effective anti-worm infrastructure requires significant resources. Base building with proper worm-resistant materials, crafting replacement vehicles after losses, and manufacturing thumpers all demand substantial Solari investment.
This creates a natural opportunity for resource management. Many players find that purchasing Dune Awakening solari through Lootbar.gg provides a secure, quick, and reliable way to stay prepared for worm encounters. Having sufficient Solari reserves ensures you can quickly rebuild after catastrophic losses or invest in preventative measures like ornithopters and multiple backup vehicles.
Survive the Shai-Hulud
Mastering sandworm survival in Dune: Awakening combines careful movement, strategic tool use, and thorough preparation. By sticking to rocky terrain, minimizing vibrations, recognizing warning signs, and utilizing the right equipment, you can navigate even the most worm-infested regions successfully.
Remember that worm encounters are an inevitable part of the Arrakis experience – the goal isn’t to avoid them entirely but to manage the risk they represent. With practice, you’ll develop an intuitive sense for safe movement that becomes second nature.
For those moments when preparation fails and you need to quickly rebuild, buy Dune Awakening solari from a trusted source like Lootbar – a practical decision that keeps you in the game when Shai-Hulud claims its tribute. The desert may be harsh, but with the right knowledge and resources, you can thrive where others merely survive.